Rethinking Dependence on Dependencies
This article was published on medium.
Rethinking Dependence on Dependencies
Time spent programming is time spent learning; regardless of one’s opinion on coding projects for job applications, these sorts of projects are good for experimenting.
Have you ever gone to start a project — even a smaller project — and run into immediate decision fatigue? Front end! Should I use React or try Vue? Do I want to use a CSS preprocessor; should I take the opportunity to flaunt some Redux; should I play with something like Pagedraw? What kind of server should I spin up? I’ve been loving .NET Core lately; nodejs is a core competency; then again I would like to write more Go…and so on. Spending time researching these choices might be beneficial, but you need to jump through this hoop to get to the next stage in the process.

Too many #$%^ choices
I recently had a job interview coding challenge to build a simple chat application. The messages should show up reasonably quickly; consider data persistence; don’t sweat presentation too much; don’t worry about authentication, etc. For a real-time chat application, websockets seemed like a good fit.
So now I’m looking for frameworks with good websocket support. After wasting an hour or two cloning repos and scaffolding projects just get rm -rf ‘d, I decided to limit dependencies as much as possible and focus on solving the core problem.
I learned a lot by avoiding dependencies. Nothing seemed extraneous, each line of code served a specific purpose. There weren’t any ‘this is hacky but…’ bits of code.
While it took longer to write some of the code (mostly due to unfamiliarity), I ended up spending significantly less time configuring dependencies. The entire implementation has only 2 dependencies for a total of 6 directories in node_modules! The whole solution ended up being very small and lightweight.
I am not a very dogmatic developer, and a lot of our modern tooling saves time and effort. But how often are we reaching for familiar paradigms without asking: does this help solve a problem that I have?
Ideally, every dependency should be introduced when it becomes frustrating or impossible to continue without it. This can be achieved by deferring decisions until a decision must be made; in this case, I deferred server and data persistence until I had finished everything I could for the front end using no dependencies.
For small projects such as an interview coding challenge, it’s easy to fall into the temptation to showcase your knowledge and skill in all of the latest trends and frameworks. It’s easy to use the opportunity to learn about something new. But the truth is, for a developer at any level, solving a problem simply and elegantly demonstrates your skill and value. At the end of the day, the people using our software only care about the ability to solve their problems.
There's something so zen like about simplicity
If you want to see the results of my little experiment, check out the github repo.
For me, Docker/containerization is mandatory. The advantages of a clean runtime environment and the elimination of “it works on my machine” make the benefits worth the investment for any size of project. So I stood up a Dockerfile and docker-compose.yml. Most of the details are unknown at this time, but when the files are scaffolded it’s easy to make updates as we go.

THIS IS WHY WE DOCKER!
To get started, I stubbed out simple html, css, and js files in a ./web directory. I spent some time doing styling and layout work (which is not my forte), identifying interactions between components, and hooking up event handlers in vanilla JS. I started stubbing out the WebSocket function, but ended up just commenting it out and focusing on the basics.
I continued building front end, just loading the files into my browser, until I needed to implement the server to continue.
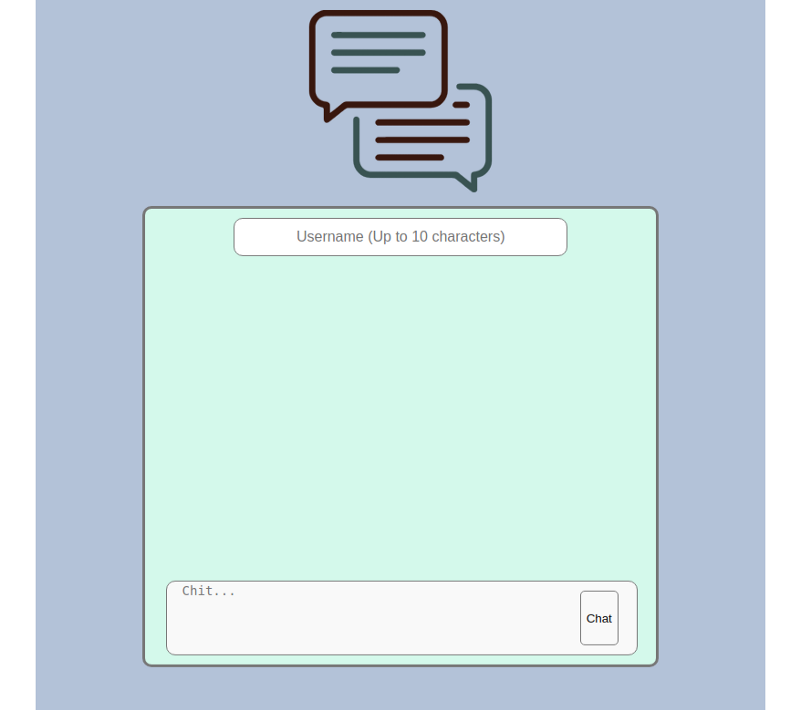
I eventually got something hacked together!
I haven’t written front-end vanilla JS since ES5. It was a lot easier than configuring a front-end framework; even setting up one I know well or might have scaffolded.
const DomEventHandler = (() => {
    const submitChat = e => {
        e.preventDefault();

        if (!username.value || username.value.length > 10) {
            usernameValidation.classList.remove('hidden');
            window.setTimeout(() => {
                usernameValidation.classList.add('hidden');
            }, 1200);
            return;
        }

        if (!textArea.value) {
            return;
        }

        const message = {
            user: username.value,
            message: textArea.value,
        };

        WebSocketHandler.sendMessage(message);
        textArea.value = '';
    };

    const textAreaKeyPress = e => {
        if (e.ctrlKey && e.keyCode === KEY_MAP.ENTER) {
            DomEventHandler.submitChat(e);
        }
    };

    const onFocusWrapper = wrapper => () => {
        wrapper.classList.add('focus');
    };

    const onBlurWrapper = wrapper => () => {
        wrapper.classList.remove('focus');
    };

    return {
        textAreaKeyPress: textAreaKeyPress,
        submitChat: submitChat,
        onFocusWrapper,
        onBlurWrapper,
    };
})();
I decided to build the server with node, but I didn’t want to waste more time configuring an API framework to my preferences; especially for such a small project. I figured I could just use the native http module and handle routes manually. Then, it occurred to me that I didn’t know how! There was a lot of googling, and progress was slow in some ways. Once I understood how it worked, it was trivial to create a request handler that would server up my simple front end.
index.js
const http = require('http');
const httpHandler = require('./src/httpHanlder');
const server = http.createServer(httpHandler);
const port = process.env.PORT || 80;
server.listen(port);
httpHandler.js
const fs = require('fs');
const path = require('path');
const promisify = require('util').promisify;
const readFile = promisify(fs.readFile);

const mimeTypesMap = {
    '.html': 'text/html',
    '.css': 'text/css',
    '.js': 'text/javascript',
    '.png': 'image/png',
    '.svg': 'image/svg+xml',
};

const docPath = url => {
    return url === '/'The last section of this article has tutorial information on implementing websockets with vanilla JS and a minimalist node environment.
        ? path.join(__dirname, '../web/index.html')
        : path.join(__dirname, '../', url);
};

const mimeType = file => {
    const ext = path.extname(file).toLowerCase();

    return mimeTypesMap[ext];
};

const handler = async (req, res) => {
    const file = docPath(req.url);
    const contentType = mimeType(file);

    res.writeHead(200, {
        'content-type': contentType,
    });

    res.write(await readFile(file));
    res.end();
};

module.export = handler;
I had initially written a switch statement for the mimeType function, but the object literal seemed more concise and expressive.
At this point, everything was working except for the websocket implementation. I wanted to use the native WebSocketAPI on the front end, so socket.io was a no-go. I decided to timebox using ws; it pretty much just worked.
websocketHanlder.js
const http = require('http');

const httpHandler = require('./src/httpHanlder');
const webSocketHandler = require('./src/webSocketHandler');

const server = http.createServer(httpHandler);
const port = process.env.PORT || 80;

webSocketHandler(server);
server.listen(port);

module.exports = httpServer => {
    const server = new ws.Server({ server: httpServer });
    server.on('connection', socket => {
        socket.on('message', handleMessage(server));
    });
};
And the webSocketHandler was simple plumbing between Redis and websocket events:

const ws = require('ws');

const datastore = require('./datastore');

const chatLogKey = 'chat_log';

const handleMessage = server => async rawData => {
    const data = JSON.parse(rawData);
    const chatLogRaw = await datastore.get(chatLogKey);
    const chatLog = JSON.parse(chatLogRaw) || [];

    chatLog.push({
        user: data.user,
        message: data.message,
        datetime: new Date().toISOString(),
    });

    const updatedChatLog = JSON.stringify(chatLog);

    datastore.set(chatLogKey, updatedChatLog);
    server.clients.forEach(client => {
        if (client.readyState === ws.OPEN) {
            client.send(updatedChatLog);
        }
    })
};
I only wanted an array of chat messages for data persistence, so I just added redis to docker-compose. Once the messages were being passed between the client and server, it was easy enough to make a rendering function for the front end. ES6 template literals make rendering components from a collection trivial!
index.js
const mapMessagesToChat = messages => {
    const elems = messages.map(msg => {
        const isCurrentUser = username.value === msg.user;

        return `
        <div class="message-wrapper${isCurrentUser
            ? ' current-user'
            : ''}">
          <div class="message-meta">
            <div class="meta-user">
              ${msg.user}
            </div>
            <div class="meta-time">
              ${new Date(msg.datetime).toLocaleString()}
            </div>
          </div>
          <div class="message">
            ${msg.message}
          </div>
        </div>
        `;
    });

    output.innerHTML = elems.join('');
    output.scrollTop = output.scrollHeight;
};

const WebSocketHandler = (() => {
    const endpoint = 'ws://localhost:3000';
    const socket = new WebSocket(endpoint);

    socket.addEventListener('message', e => {
        mapMessagesToChat(JSON.parse(e.data));
    });

    const sendMessage = (msg) => {
        socket.send(JSON.stringify(msg));
    };

    return {
        sendMessage,
    }
})();
The entire solution only consisted of 10 or so reasonably-sized files; all of the requirements were met, and it felt good to write something truly simple.